Data sheets are, on the one hand, accompanying material for products, which may contain technical data, diagrams or drawings, and, on the other hand, in the case of offer data sheets, a compilation of the products in tabular form.
The functions available to you in this tab are used to design offer data sheets as well as editable values (“yellow fields”) on the other data sheet types.
The Data Sheets tab is divided into several sections:
◻Print / Send as Email Attachment: The buttons located here open the Print dialog or the email client for sending the documents as an email attachment.
◻Quote: In the Quote section, you can configure basic settings for the data sheets.
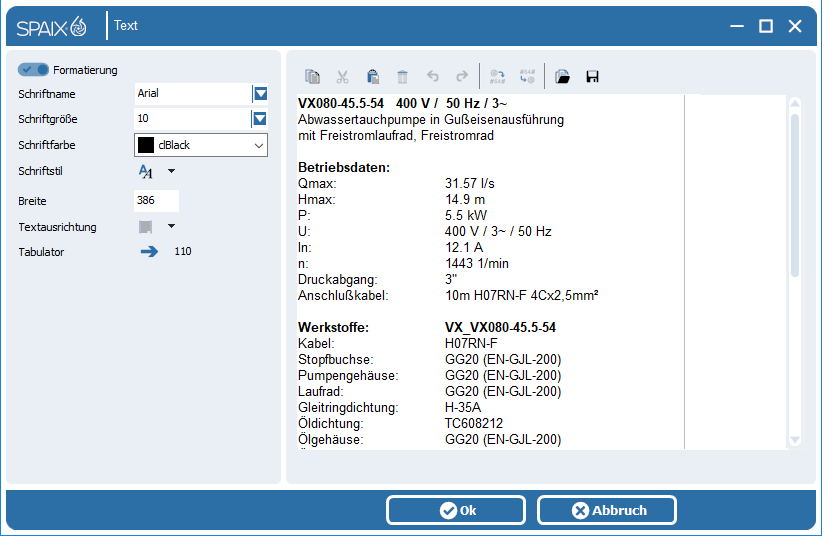
◻Font Styles and Colors: To adapt the design of text to your needs, use the functions in the Text Alignment and Font Styles and Colors sections.
|
Print Dialog:
The upper section of the dialog determines the type of printout. You can choose between printing to a printer and creating a PDF file. When printing to a printer, you can use the Change button to select the printer to be used and specify additional printing options.
The options in the PDF Settings section are only active if the Create printouts as PDF file option has been selected.
The page format is determined using the combo box. If Custom is selected, the width and height can be manually specified in the fields below.
To the right, you can use the radio buttons to specify:
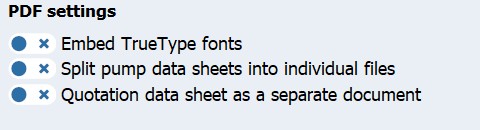
◻Whether TrueType fonts should be embedded in the PDF
◻Whether the PDF file should be opened after creation
◻Whether the PDF output should be split into separate PDF files
◻Whether the title page/cover letter should be output as a separate document
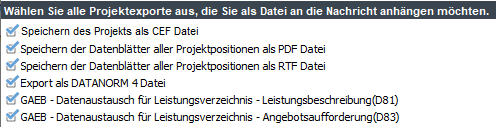
If the latter option is selected, you will be prompted for the file name of the target file as usual. The commercial data sheets (offer/product description or tender specifications) are saved under this name. The data sheets for each pump selection are saved in a separate file. These contain all data sheets for the respective selection included in the project, for example, the characteristic curve sheet, technical data sheet, piping calculation (PipeCalc), accessory data sheet, energy cost calculation, etc. The file name for the individual files is the item number in the offer file (input field in the price calculation table) added to the offer file name. If no item number exists or if a position number occurs multiple times, a consecutive number is appended to the file name.
The Print Range section defines the print area. You can print the entire project (All), specify contiguous pages (From/To), or select specific pages from the Pages/Specific Data Sheets list below (Range). The Options section specifies the number of copies to be created. You can also specify whether the data sheet sizes should be adjusted to the page format of the print medium (Fit to Page).
In this list, individual pages or data sheets can be excluded or included using the checkboxes. Once this action is performed, the Print Range changes to Range.
|
||||
|
Send as email attachment:
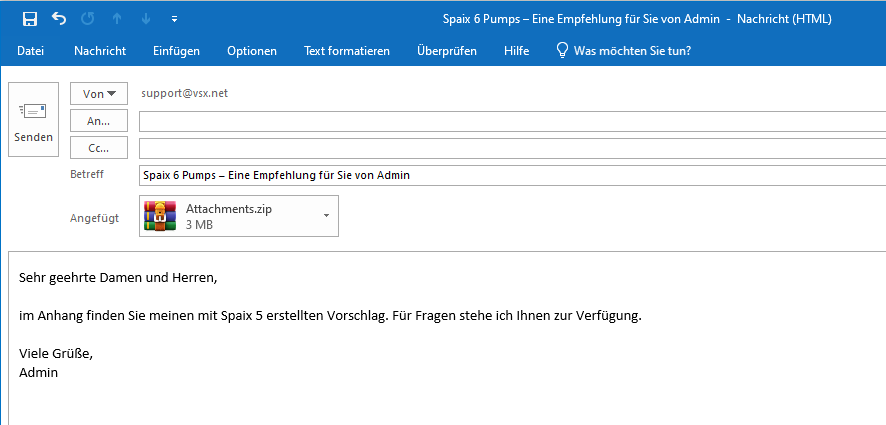
First, enter the recipient in the upper section of the dialog or select the contact details using the Contact Details dialog. Enter the email subject in the Subject field. Select your preferred email client in the Mail Client field.
In the area below, select the files to be made available as project exports. The following options are available, which can be included or excluded using checkboxes:
In the Compress as ZIP files section, you can use the checkbox to specify whether all selected project exports should be sent compressed in a ZIP file. The PDF settings can be configured in the adjacent section. This section is only active if the option to save the data sheets of all project items as PDF files has been selected.
In the lists under Pages and Additional Information, you can use the checkboxes to decide which pages or data sheets are to be excluded or included.
The status bar shows the progress of the email sending project once the OK button is pressed. The email message will then open in the client, where it can be further edited and finally sent to the appropriate recipient.
|
||||
Renumber
|
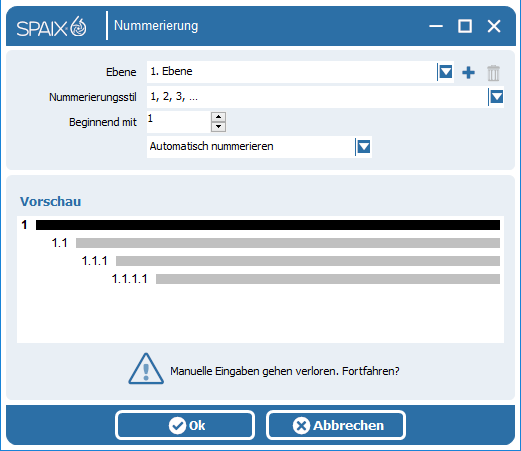
In the Renumbering dialog, the type of numbering for the price table and the offer data sheet of the currently active project is specified.
First, the hierarchical level is specified, followed by the numbering style, and finally the starting value (starting with). A preview of the specified numbering is displayed in the lower part.
|
||||
Delete numbering
|
Removes all values from the position number column.
|
||||
Effects |
Text display:
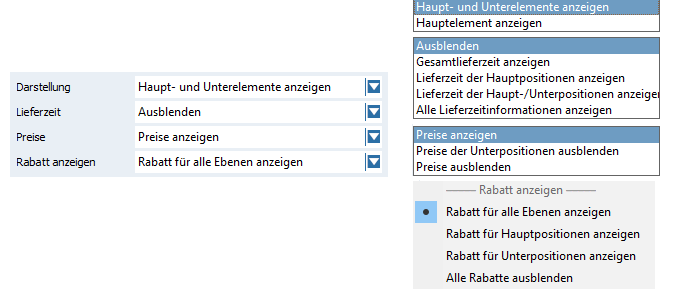
The Text Display switch opens a drop-down menu in which you will find various functions and options for displaying the price table in the offer data sheet.
◻Display: This section determines whether main elements and sub-elements, or only the main elements, are displayed in the table. ◻Delivery Time: Only available with the additional DeliveryTimeCalculator license. The lower section determines how delivery times are displayed. The following display options are available: Hide, Show total delivery time, Show delivery times of main items, and Show both, which includes the total delivery time and the delivery time of the main items. ◻Show prices and discounts: These options allow you to determine how prices and discounts are displayed.
|
||||
Change data sheet allocation
|
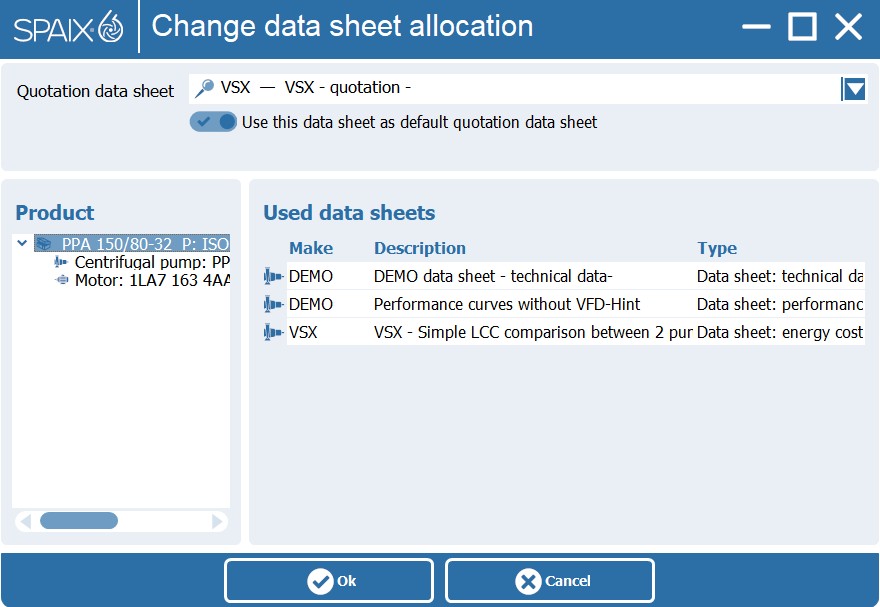
Clicking this button opens a dialog in which you can assign new offer data sheets to the project and new technical data sheets to the main items.
In the project tree structure under Product, select the item to which new data sheets should be assigned. You can choose between the entire project and individual main items.
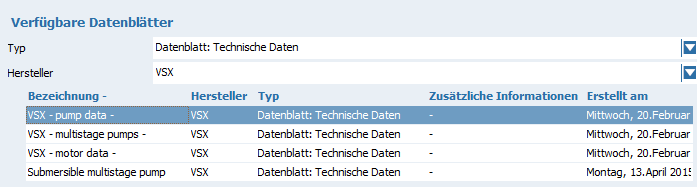
The Available Data Sheets section displays the data sheets that can be assigned to the item selected above.
For the project, it is only possible to assign quotation data sheets in the Type combo box. Data sheets for technical data, hydraulics, dimensions, etc. are available here for the main items.
The data sheets assigned to the respective position are displayed in the lower area Assigned Data Sheets.
Mit dem Schalter
The switch can be used to assign datasheets from the Available Datasheets area, while the switch can be used to remove an assigned datasheet from the Assigned Datasheets area.
|
||||
Edit item text |
In the dialog that opens, you have the option of adjusting the article text of the selected short text or long text.
|
||||
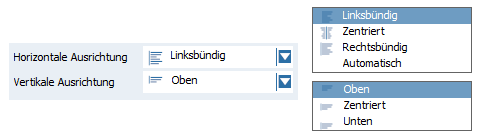
Alignment |
Horizontal alignment Vertical alignment
This selection field determines the alignment of text on the offer data sheet. Text blocks can be aligned within the designated area. When a text element is selected, this area is highlighted with a dashed border.
|
||||
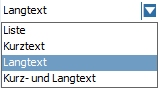
Text type |
This field allows you to specify which text should be displayed on the datasheet. The following options may be available.
The text types Note, Short Text and Long Text are only available if a note text is assigned or if a short and long text is available.
|
||||
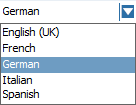
Language |
This combo box selects the language for the datasheets. This setting is independent of the program language setting.
|
||||
Units |
This button opens the Units dialog. The settings you can configure there, however, only apply to the datasheet. The settings remain unchanged for the program.
|


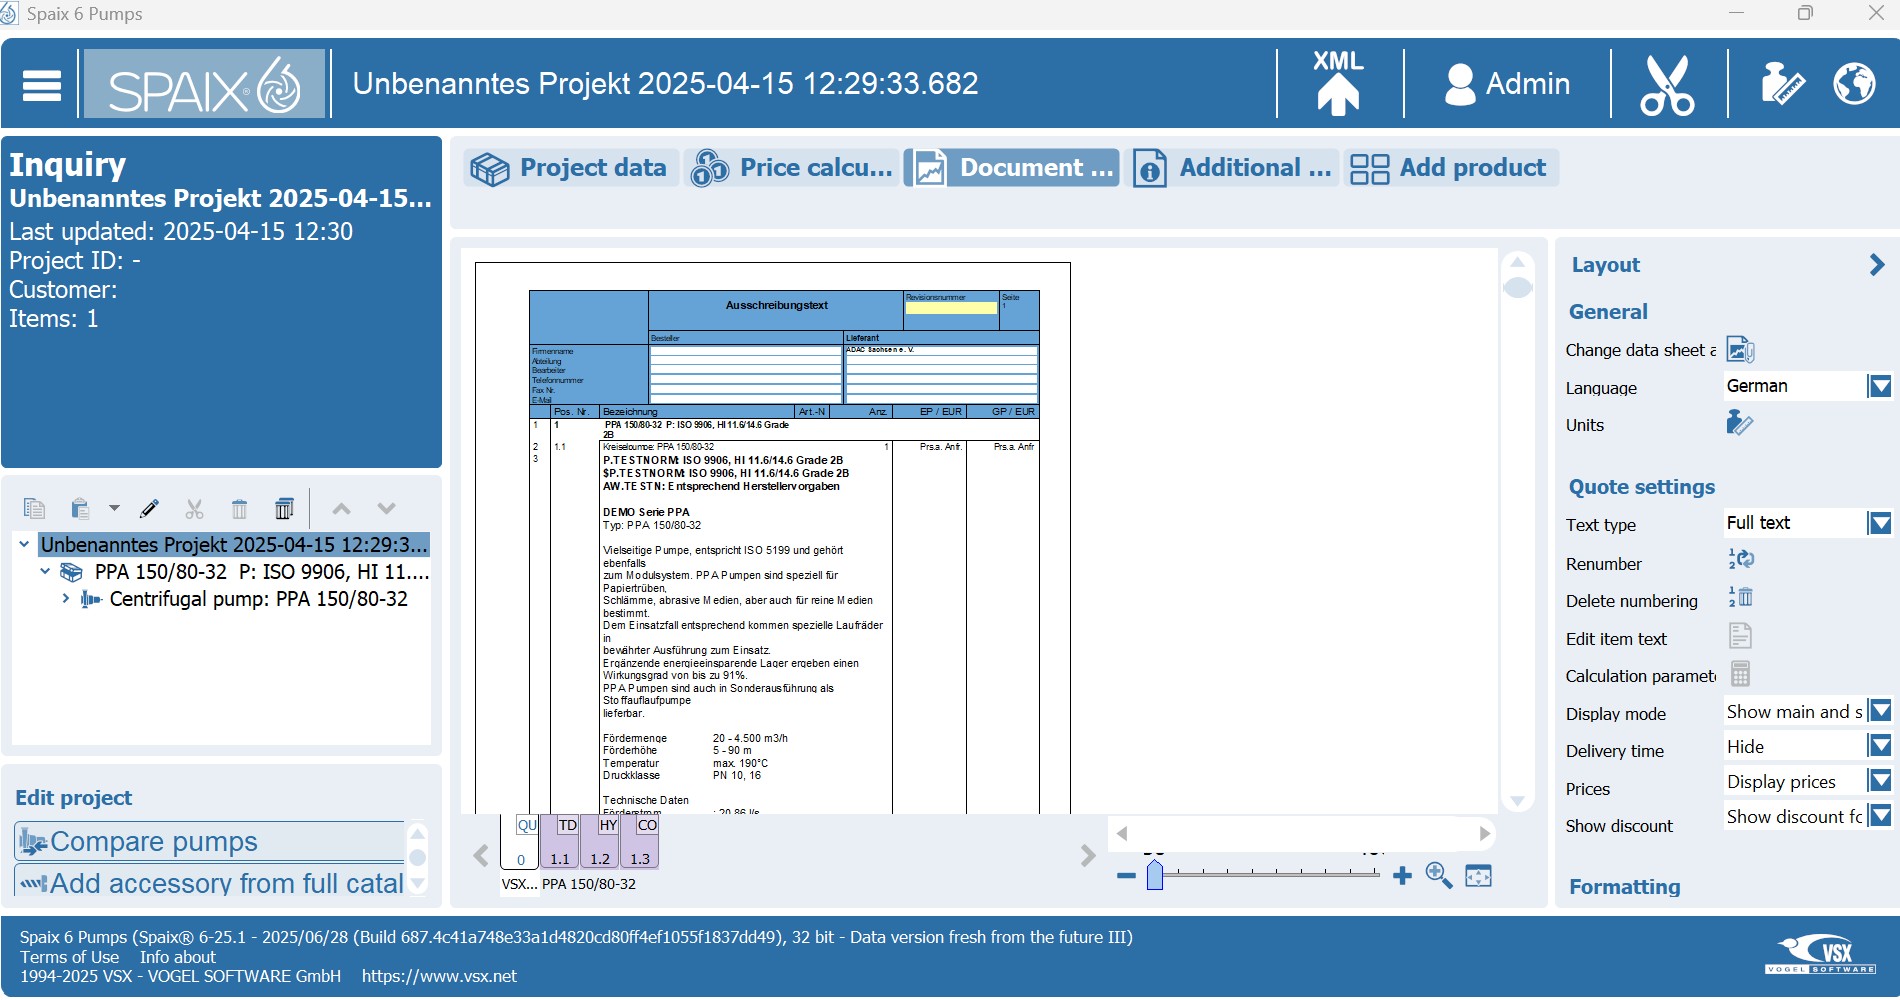
Datasheet view – Preview area
The datasheet view in the preview area is activated when you switch to this tab.
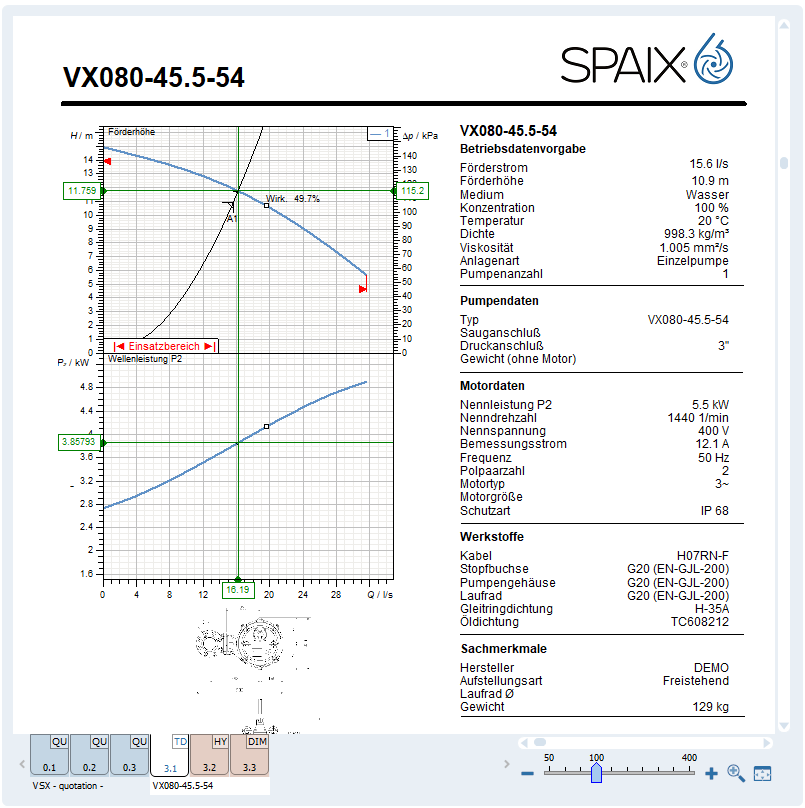
The preview interface displays the actual data sheet. The view can be zoomed in, out, or moved using the functions described under Zoom. The text editing functions require that a corresponding data sheet element is enabled and active for editing. These elements are activated by simply left-clicking on the corresponding element. This activates the available test editing options.
□Zoom: The functions in the Zoom area can be used to enlarge or reduce the view of the data sheets.
|
Zoom in:
With this button, you can drag a frame within the datasheet while holding down the left mouse button. The view will then be zoomed in on the selected section.
|
|
Undo:
This button resets the last zoom option applied.
|
|
ZoomToFit:
This switch automatically sets the datasheet zoom level to a value at which a datasheet page is completely displayed in the available preview area.
|
|
The zoom bar at the bottom right shows the current zoom level and, similar to Office programs, allows you to adjust the zoom level by moving the slider. The coordinates below indicate the current position of the mouse pointer in the datasheet.
|

The datasheet icons in the lower left corner represent the associated datasheets.
◻Left-clicking on a datasheet icon displays the corresponding datasheet.
◻Left-clicking on the [-] or [+] symbol in the upper left corner of the datasheet icons reduces or enlarges the icon view.
◻Right-clicking on a datasheet icon opens the context menu option "Delete datasheet" to delete the selected datasheet.

The order and numbering of the data sheet symbols corresponds to the order of the individual main items, which are preceded by the offer data sheet.
The numbering is structured according to the pattern {No. of selection}.{Data sheet.Page}.
|
Example: Numbering of data sheets |
0.1... Quotation data sheet (page 1) 0.2... Quotation data sheet (page 2) 0.3 ... Quotation data sheet (page 3) 1.1 ... Technical data for 1st pump 1.2 ... Performance curve for 1st pump 1.3 ... Motor characteristic curve for 1st pump 1.4 ... Accessory data sheet for 1st pump 2.1.1 ... Technical data for 2nd pump (page 1) 2.1.2 ... Technical data for 2nd pump (page 2) 2.2 ... Performance curve for 2nd pump 2.3 ... Motor characteristic curve for 2nd pump |
|
The numbering can also be found in the page overview of the print dialog.